-
Shop
- Advanced Technologies
- AI Skills
- AI Skills Mastery 2026 Collection
- Bathroom
- Best-Sellers
- Car Accessories
- Confidence
- Dating & Social Skills
- Digital Resources
- AI & Technology
- Beauty
- Budgeting & Saving
- Car Buying & Ownership
- Electronics & Technology
- Entrepreneurship & Business Growth
- Financial Independence
- Financial Mindset & Psychology
- Goal Setting
- Home Styling & Organization
- Kitchen & Recipes
- Leadership
- Mindset
- Online Business
- Parenting & Child Development
- Personal Style & Fashion
- Pet Lifestyle & Wellness
- Positive Thinking
- Sleep Improvement
- Smart Life with AI
- Stress Management & Relaxation
- Wellness
- Yoga & Mind-Body Practices
- Education & Learning
- Family & Parenting
- Fashion
- Financial Education
- Furniture
- Gadgets
- Health & Beauty
- Health & Wellness
- Home & Garden
- Home Electronics
- Kids & Babies
- Kitchen
- Kitchen Best-Sellers
- Lighting
- Luxury Brands Collection
- Patio, Lawn & Garden
- Personal Growth
- Pet Care
- Pet Supplies
- Pets
- Sport & Outdoors
- Stress Relief & Relaxation
- Travel
- Travel & Adventure
- Wealth
- Popular
- Best deals
Kitchen Zones That Work: Organize for Better Flow Fast
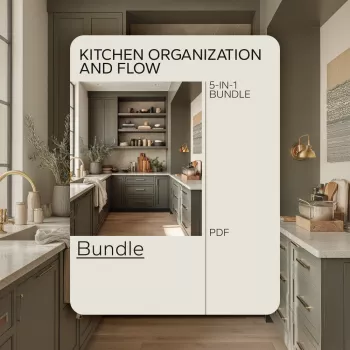
A Simpler Kitchen Setup: Organize by Zones, Improve Flow, and Keep It That Way
A functional kitchen is less about having more storage and more about creating a predictable flow: items live where they’re used, work surfaces stay clear, and daily routines don’t require constant re-shuffling. A zone-based setup reduces friction in cooking, cleanup, and meal prep—especially when it’s paired with a few maintenance habits that make “resetting” feel automatic rather than like another chore.
What “good flow” looks like in a real kitchen
Good flow is easy to spot because it feels calm. You’re not searching for basics, you’re not moving piles to find a cutting board, and cleanup isn’t a scavenger hunt. Here’s what that looks like day to day:
- Fewer steps: the most-used items are within arm’s reach of where they’re used (coffee supplies near the kettle/coffee maker, knives near the main prep surface).
- Clear counters: only daily essentials stay out; everything else earns a designated home.
- One-touch cleanup: trash, compost, and recycling are easy to access from the main prep zone; dish soap and towels are near the sink.
- Predictable restocking: staples have fixed, visible locations so it’s obvious what’s running low.
- Less decision fatigue: categories are consistent (baking, snacks, breakfast, oils/vinegars) so anyone in the household can put items back correctly.
Kitchen zones, what belongs there, and quick setup tips
| Zone | What to store here | Fast win |
|---|---|---|
| Prep zone | Knives, cutting boards, mixing bowls, measuring tools, prep towels | Keep the top 5 prep tools in the same drawer every time |
| Cooking zone | Pans, pot lids, utensils, oils, spices used daily | Store lids vertically; keep oils/spices on a small tray for easy wipe-down |
| Coffee/breakfast zone | Mugs, coffee/tea, sweeteners, filters, oatmeal/cereal | Create a single “morning shelf” so the routine starts in one place |
| Snack zone | Kids’ snacks, bars, chips, grab-and-go items | Use bins labeled by type; keep it at eye level for self-serve |
| Dish & cleanup zone | Dish soap, sponges, dishwasher pods, towels, trash bags | Keep backups directly under the sink in one bin |
| Storage/pantry zone | Staples, canned goods, baking supplies, backstock | Group by meal type (breakfast/lunch/dinner) or by category (grains/proteins/veg) |
A quick reset before organizing: reduce the friction
Before you buy organizers or start labeling, remove the everyday obstacles that keep a kitchen from staying neat. This isn’t a “pull everything out at once” project—focus on the highest impact area first.
- Start with the biggest bottleneck: the drawer/cabinet that creates the most daily annoyance (often utensils, lids, or the “junk drawer”).
- Remove everything from one area at a time to avoid turning the whole kitchen into a project.
- Wipe shelves and drawers before putting anything back; clean surfaces help maintain order longer.
- Set a simple rule for duplicates: keep the best version accessible and move extras to backstock or donate.
- Collect “homeless items” in a temporary bin; decide their homes after zones are established.
Set up zones that match your routine (not an idealized kitchen)
The most “organized” kitchen isn’t the one that looks like a showroom—it’s the one that matches how you actually move. Build zones around real habits so you don’t have to force yourself to maintain a system that fights you.
- Map the daily path: where groceries enter, where coffee happens, where the main prep surface is, where dishes land.
- Place the heaviest items low and close to where they’re lifted (mixers, Dutch ovens, cast iron).
- Keep kid-accessible snacks and lunch items in a dedicated bin or shelf to reduce constant requests.
- Make “landing zones” intentional: one tray or basket for mail/keys if the kitchen is the household hub, so clutter doesn’t migrate to counters.
- If space is tight, use micro-zones: a single drawer can be a complete baking station (measuring cups, spoons, small whisk, vanilla).
Storage systems that stay tidy with minimal effort
Organizing isn’t about adding containers everywhere—it’s about placing friction-reducers exactly where clutter tends to form. The goal is to make the “right” action the easiest action.
For food storage decisions—especially when you’re clearing leftovers during a weekly refresh—use trusted guidance like the USDA FoodKeeper App. And when you’re deep-cleaning high-touch areas, the CDC’s cleaning guidance is a helpful reference for keeping routines practical and safe.
Checklists that make maintenance automatic
A guided kit for organizing and flow: what a bundle can help with
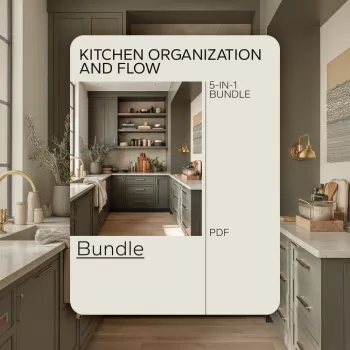
For a more guided setup, consider The Kitchen Organization and Flow Bundle – Guides, eBooks & Checklists to Make Your Kitchen More Functional.
If your counters regularly become a “morning drop zone” (makeup, hair tools, chargers), moving those items out of the kitchen can protect your prep space. A dedicated station like the Modern White Vanity Makeup Table Set with Lighted Mirror and Storage can help keep kitchen zones focused on cooking and cleanup.
FAQ
How long does it take to organize a kitchen so it actually stays organized?
Most kitchens improve noticeably in a few focused sessions spread over 1–3 weeks. Start with one high-impact zone, then build outward, and rely on simple daily/weekly resets to keep the system from drifting.
What’s the best order to organize kitchen areas?
Prioritize the prep and cleanup zones first, since they affect almost every meal. Next tackle cooking tools and daily-use cabinets, then finish with pantry/backstock—while still addressing your biggest daily pain point early for quick relief.
How can a small kitchen feel more functional without remodeling?
Use zone planning, go vertical for boards/sheets/lids, limit duplicates, and keep counters as clear as possible. Micro-zones (one drawer = one “station”) and rotating rarely used items out of prime space make a big difference fast.
Recommended for you


Multi-Pet Hygiene Routine: Fresh Home, Less Odor
Aug 14, 2026
Modern 24-Piece Stainless Steel Cutlery Set for 6
Aug 15, 2026












Leave a comment